Showing posts with label Joy's Life Stamps. Show all posts

Sunday, June 8, 2014

You're Just Peachy Card

Hello, and long time-no-see, everyone!  I have been incredibly busy lately!!!!!!  I wrapped up another school year (with 2nd graders this time), had a huge Fiesta at my house, helped a friend plan her wedding, AND, last but not least, I GOT MARRIED!!!!  :)  It has been non-stop around here!  Now my hubby and I are working on tearing out the carpets and breathing new life into the hardwood floors in the house, so the fun just never ends...  ;)  I think often of posting on my blog, but I have just not had the time at all!  I have been working on projects, though.  I made a lot of things for my new classroom this year, made a few cards, and I put a TON of effort/planning/crafting, etc. into my wedding!  I will be posting pictures of that soon.  But for now, I have a card that I am going to enter into a couple challenges.  My grandma got really sick with pneumonia in April, and I made her this card to help cheer her up.  She is doing much better now, and we are so happy & thankful she's back to her spunky ol' self again!  Here it is!

Krafty Girls Challenge- Face Off: use a face on your project
Bitten by the Bug- Alter a Cricut cut:  I inked the edges, added Stickles, and stamped a face
Pile it On- use patterned paper


A2 sized card
Serenade- peach cut at 3.12"
Cuttlebug- chevron
Joy's Life Stamps- Everyday Occasions
Scrappy Moms Stamps- Good Eats
Peachy Keen Stamps- Everyday Character Face Assortment
Martha Stewart border punch
Stickles- star dust, lime green
Glossy Accents

That's all there is to it!  Hope you like the card, and I'll hopefully be back soon!!!!  :)

Here's a wedding picture I'll share before I do the wedding post later...  This one is my favorite picture of us from the wedding!  I'm swooning over here, it was a perfect day...  :)


Tuesday, January 7, 2014

Popping By to Say Hi Card

Hello everyone!  Well, I am officially back at work after having 3 weeks off for Christmas vacation.  I wanted to feel sorry for myself, but then I realized that I had just had 3 weeks off, so I needed to just focus on that!  :)  As it turns out, I'm having a lot of fun showing off my engagement ring, and my students love looking at how "sparkly" it is!  I also missed my co-workers and students, so it's definitely not all bad... :)  I made another card for some challenges.  I was bummed that this one didn't photograph very well.  The popcorn kept looking washed out on camera, and I couldn't change it so I'm rolling with the punches!  Hope you enjoy!

Sister Act Card Challenge- anything goes, but must be a card
The Paper Players- use the chalkboard technique
Fusion Card Challenge- use the sketch and/or the picture


A2 sized card
George and Basic Shapes- I welded together some circles and shaped them with my scissors to make the popcorn
Joy's Life Stamps- Yummy Puns
Red paper strip cut at 3 1/2 x 5 1/2"
Black paper strip cut at 2 1/2 x 5 1/2"
Colored pencils/chalk (to give texture to popcorn)
Foam tape
Twine
White ink

That's all there is to it!  Thanks for "popping" by!  :)

Tuesday, July 16, 2013

Little Birdy Gift Card Holder

Hello everyone!  I am so excited to be here with another Krafty Girls challenge!  The challenge this week is: Birds of a Feather- create any paper craft with a bird theme.  I LOVE birds, so this was fun for me!  I also thought it was time to change things up a bit, so I made something other than a card...  I decided to make a gift card holder, since that seems to be what I always give to my family and friends these days!  Everybody loves gift cards...


Wedding- pillow box cut at 4.65"
3 Birds on Parade- bird cut at 1.82"
Cuttlebug- poteeka birds (The Paper Studio)
My Pink Stamper Stamps- Tweetie Hoo Puns
Joy's Life Stamps- Wintery Puns
Stickles- yellow

That's it!  Thanks for stopping by!!!!  Be sure to flock on over to Krafty Girls to enter the bird-themed challenge!  :)

Tuesday, July 9, 2013

Fish You Were Here Card

Hello!  It's Tuesday, you know what that means...  Another Krafty Girls challenge!!!!  The challenge this week is:  Die Cuts- create any project, and incorporate a die cut.  I felt like this was almost an "anything goes" challenge because I use die cuts on everything I make!!!  When the sky's the limit, it's really tough for me to narrow down what I want to make.  When that happens to me, I just go to my stamp sets and start looking for a sentiment I want to use, then the ideas just start flowin'!  This card would be perfect to send to someone who you are missing...


A2 sized card
Zooballoo- waves cut at 1.35"
George and Basic Shapes- rectangle (welded to waves) 5.71"
Create a Critter- hearts cut at 7.47, 6.27, & 5.24"
Life is a Beach- fish cut at 3.94", seaweed cut at 4.88" (both are from the fishbowl cut)
Cuttlebug- sunshine impression plate (PaperTrey Ink)
Joy's Life Stamps- Wild Life Puns
Stickles- star dust, Christmas red, lime green
Glossy Accents
Googly eye
White gel pen (I hand wrote the word "love" onto the heart)

Thanks for stopping by!  I sure do "fish" that you'll stop by Krafty Girls and enter the challenge!  :)

Tuesday, June 18, 2013

Father's Day Guitar Card

Hello!  I am so glad that I am on summer break!  It has allowed me to do some crafting, which I have been finding it hard to squeeze in lately...  I am also over halfway through my 6-unit class I'm taking, so vacation is about to really begin!!!  :)  The class has actually been really fun, so that's been nice...  The card I have for you today is for my Dad.  He truly is the best dad ever!!!  He also looks at my blog all the time, so "hi Dad"!  I also made this card for the new Krafty Girls challenge.  The challenge this week is:  Musically Inclined-  Make any project with a music theme. 


A2 sized card
Hannah Montana- guitar cut at 1.71"
Joy's Life Stamps- Holiday Occasions & Everyday Occasions
Glossy Accents
Fishing line

I covered the entire blue part of the guitar with Glossy Accents, then I made strings out of fishing line.  Thanks for stopping by, and be sure to join us in the challenge over at Krafty Girls!

Wednesday, January 23, 2013

Happy Bird-day Card for My Sister

Hello everyone!  The card that I have for you today is a birthday card for my sister!  She is the best sister anyone could ever ask for, and I love her very much!!!!!  Happy Birthday Joni!  :)  My sister loves owls, puns, and colorful bling and this card has all of those things!!!!  Woo hoo!  I also wanted to enter some challenges, so I went lookin' and I found some fun ones to enter...  This card meets challenge requirements AND it's perfect for my sister's birthday....  so, I guess you could say it "kills two birds with one stone" (sorry, I couldn't resist, seeing as my card has two birds on it)!  :)  Okay, onto the card...

My Craft Spot- use bling
Paper Playtime- use some brown
The Cuttlebug Spot- use squares
Penny's Paper-Crafty Challenge Blog- embossing
Mojo Monday- use the sketch


A2 sized card
George and Basic Shapes- rectangle cut at 2.13 x 3.64", squares cut at 1.59"
Hoot 'n' Holler- owls cut at 2.76" (left one), 2.06" (right one)
Wild Card- branch cut at 3.24"
Cuttlebug- wood grain (Papertrey Ink)
Joy's Life Stamps- Wild Life Puns
Twine
Rhinestones

Okay everyone, hope you like it....  Thanks for stopping by!!!!  :)

Saturday, January 19, 2013

Retirement Cards & A Cute School Project

Hello!  I am sooo excited that I have a 3-day weekend!  I haven't done much crafting since my Christmas vacation ended, but I wanted to share some cards that I made.  My mom and our family friend, Robin both retired recently, and neither one of them were given a proper party at work, so....  we had a surprise party for both of them last night!  It was so fun, and these are the cards I ended up making for them.  Oh, and at the bottom of this post I just have to share an art project that my students did for Martin Luther King, Jr. Day...


4" square card

Cuttlebug- In Bloom impression plate (Papertrey Ink)
Joy's Life Stamps- Joyful Hearts & Everyday Occasions
Twine

Okay, now here is the cutest Martin Luther King, Jr. project!  I found this idea on Pinterest, and I just couldn't resist making it...  My class LOVED making this project, and they loved talking about Martin Luther King.  I showed them a video of his "I Have a Dream" speech and they were mesmerized!  First graders are just too adorable!  :)  The project in the picture is the one that my niece made...


Thanks for stopping by, and I hope you all have a great weekend!  :)

Thursday, January 3, 2013

Thank You SNOW Much Card

Hello everyone!  I have not been doing anything over the past couple of days!!!  All I have been doing is cleaning, organizing, crafting, etc...  Tomorrow I am getting out of the house, and I am thrilled about it!  I can't believe that I have another card today, and I was able to squeeze it into a few challenges!  YAHOO!!!  Next week I will be back at work, so I won't be able to craft like a maniac (as much)...

Little Scrap Pieces- winter
Penny's Paper-Crafty Challenge Blog- use your favorite embellishments (mine are Stickles & twine)
Creative Cutter Room- shaped thank you card
Mojo Monday- use the sketch
Go Fish Challenge- snow or winter
My Paper Crafting- snowflakes
Shabby Tea Room- monogram madness & photo inspiration


Wild Card- scalloped card base cut at 5.47"
George and Basic Shapes-  circles cut at 2.29 & 4.65", rectangle cut at 4.06"
Winter Woodland- large snowflake cut at 1.82"
Christmas- smaller snowflakes cut at .65"
Doodletype- "L" cut at 1.71"
Cuttlebug- snowflakes
Joy's Life Stamps- Wintery Puns
Stickles- star dust
Twine- stone

Thank you SNOW much for stopping by!  :)

Sunday, December 9, 2012

Cold Hands, Warm Heart Tag

Hello!!!!!  I am so shy about my post today!  For the Joy's Life DT we are supposed to share a tip or technique with our project...  Well...  I am not the best at giving tutorials/tips...  I find that a little sad, seeing that I am a teacher!!!!  I also couldn't think of what I could possibly give a tip about, but then it clicked...  Fuzzy Fun Flock!  I'm going to show you how I use this awesome stuff...  Okay...  here it goes...


Tags, Bags, Boxes & More- tag cut at 4.06"
Winter Frolic- snowman cut at 3.24"
Hoot 'n' Holler- heart cut at 1.24"
Joy's Life Stamps- Oh Christmas Puns
Fuzzy Fun Flock- envious green & chili pepper red

Okay, here's my "tip"...

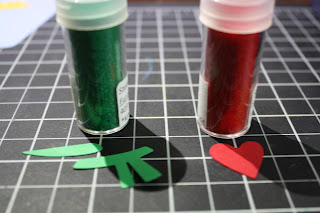
These are the supplies you'll need to make something "fuzzy" (a.k.a. super adorable).  I use my Xyron sticker maker, with permanent adhesive. 

You'll want to choose a cardstock color that is similar to the color of the Fuzzy Fun Flock you want to use.  White cardstock with a colored flock just doesn't look as nice...  I'll show you an example in a bit....


Run the pieces that you want to flock through the sticker maker, upside down.  Once that is done, I make sure to rub the back of the pieces with something hard (I used the fun flock bottle) to make sure that all of the adhesive is sticking to the other side. 


Peel the pieces off of the adhesive paper and just "dump" on the fun flock (like my technical term there?!?).  Then I rub the entire piece with my finger to make sure the flock is sticking to the image and is completely covering all of the adhesive.  Then you just tap off the excess (just like using glitter).  VOILA!  You're done, you have made something fuzzy!  Just use the pieces on your project any way you want!!!!

This is an example of why you want to use a colored cardstock, not white.  The left was done with white cardstock, and the right was done with the red cardstock.  To me, it just looks so much better with the colored cardstock...  :)

That's all there is to it!  I hope you found that somewhat helpful...  Thanks for stopping by!!!  :)

Monday, December 3, 2012

Treat Box & Caramel Recipe!!!

Hello!!!  I'm telling you that it is a dangerous thing for me to have sweets in the house!  I made cookies for yesterday's post and caramels for today's post, so I am surrounded by delicious things and my will-power is weak!  :)  I am taking the leftovers to work tomorrow, and hopefully they will be completely devoured so I don't have to bring them back home!  I froze some of the shortbread cookies, and they are so yummy out of the freezer...  Anywho, for today's Joy's Life DT project, we were asked to make a food project.  I love making sweets, so I decided to make a little treat box and fill it with homemade caramels!  Let me tell you folks, I do not like caramels from the store, but these little beauties are so delicious!!!!!  At the bottom of this post I will share the recipe with you!!!!  YUM!


Winter Frolic- Santa cut at 2.88", tree cut at 3.71"
Sweet Tooth Boxes- treat box/lid cut at 6.41"
Cuttlebug- snowflakes
Joy's Life Stamps- Oh Christmas Puns
Transparency film
Caramels

Okay, here's the recipe....  Soooooo good!  Thanks for stopping by!!!  :)

Chewy Caramels
Recipe from allrecipes.com
  • 1 cup butter or margarine
  • 1 pound light brown sugar (about 2 1/2 cups)
  • 1 (14 ounce) can sweetened condensed milk
  • 1 cup light corn syrup
  • 1 pinch salt
  • 1 1/2 teaspoons vanilla extract

Directions

  1. In a heavy bottomed saucepan over medium heat, combine the butter, brown sugar, sweetened condensed milk, corn syrup and salt. Bring to a boil, stirring constantly. Heat to between 234 and 240 degrees F (112 to 116 degrees C), or until a small amount of syrup dropped into cold water forms a soft ball that flattens when removed from the water and placed on a flat surface. Cook for 2 minutes at that temperature. Remove from the heat and stir in vanilla.
  2. Meanwhile, butter a 9x13 inch baking pan. When the caramel is ready, pour into the buttered pan. Allow to cool completely at room temperature. Remove from the pan and cut into squares using scissors. Wrap individual pieces in waxed paper or cellophane.

Sunday, December 2, 2012

Happy Holidays Blog Hop!!!!


Hello everyone, and welcome to the Joy's Life DT Happy Holidays Blog Hop!!!!  If you just hopped here from the very talented Staci, you're in the right place.  To start from the beginning click HERE.

Oh, I am so excited that the holidays are here, and that Christmas is right around the corner!  One thing that I love to do around Christmas is bake!  The cookies that I used in this project are soooo delicious, and I will share the recipe for them at the bottom of this post!  I thought it would be cute to stack the cookies in a jar to give as a gift.  I love using jars!  On this project I used both of Joy's Christmas stamp sets:  Wintery Puns & Oh Christmas Puns!


Storybook- label cut at 1.82", 2.29"
Joy's of the Season- holly branch cut at 2.53"
Joy's Life Stamps- Wintery Puns on label, Oh Christmas Puns on the lid
1.5" circle punch
Ribbon
Jar

You're next stop on this awesome hop is Laura!  Thanks for stopping by and Happy Holidays!  :)

Here's the recipe for the cookies I used in this project!  YUMMO!  :)

White-Chocolate Cherry Shortbread Cookies

White-Chocolate Cherry Shortbread
Ingredients:
  • 1/2 cup maraschino cherries, drained and finely chopped
  • 2 1/2 cups all-purpose flour
  • 1/2 cup sugar
  • 1 cup cold butter
  • 12 ounces white chocolate baking squares with cocoa butter, finely chopped
  • 1/2 teaspoon almond extract
  • 2 drops red food coloring (optional)
  • 2 teaspoons shortening
  • White nonpareils and/or red edible glitter (optional)
Directions:
 
1. Preheat oven to 325 degrees F. Spread cherries on paper towels to drain well.
2. In a large bowl, combine flour and sugar. Using a pastry blender, cut in the butter until mixture resembles fine crumbs. Stir in drained cherries and 4 ounces (2/3 cup) of the chopped chocolate. Stir in almond extract and, if desired, food coloring. Knead mixture until it forms a smooth ball.
3. Shape dough into 3/4-inch balls. Place balls 2 inches apart on an ungreased cookie sheet. Using the bottom of a drinking glass dipped in sugar, flatten balls to 1-1/2-inch rounds.
4. Bake in preheated oven for 10 to 12 minutes or until centers are set. Cool for 1 minute on cookie sheet. Transfer cookies to a wire rack and let cool.
5. In a small saucepan, combine remaining 8 ounces white chocolate and the shortening. Cook and stir over low heat until melted. Dip half of each cookie into chocolate, allowing excess to drip off. If desired, roll dipped edge in nonpareils and/or edible glitter. Place cookies on waxed paper until chocolate is set. Makes about 60.

Joy: http://joyslife.com
Stacey: http://staceyscreativecorner.blogspot.com
Jennie: http://earthyscrap.blogspot.com
Lori: http://got2bcrafting.blogspot.com
Debbie: http://bugjuiced.blogspot.com
Sarabeth: http://www.chroniclesofsarita.blogspot.com
Jenny: http://jennyplace26.blogspot.ca
Patty: http://craftykitten1.blogspot.com
Kimberly: http://hellocutiecrafts.blogspot.com
Megan: http://thoughtsoftraveling.blogspot.com
June: http://simplyelegantpapercrafts.blogspot.com      
Staci: http://preciousmem.blogspot.com
Amy: http://redheadedcrafter.blogspot.com  
Laura: http://www.laurascraftsandmore.com
Cyndy: http://arcyscraps.blogspot.com